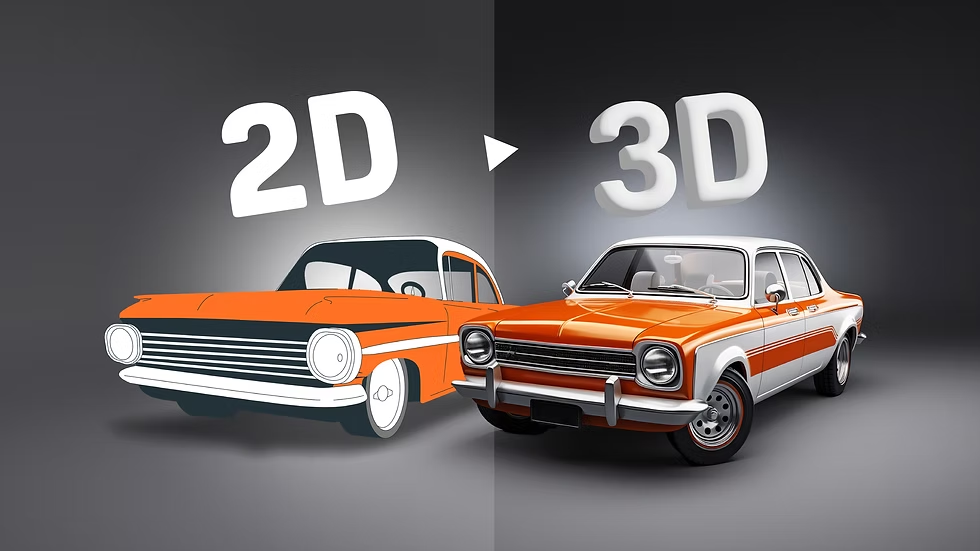
How to Turn an Image into a 3D Model: Everything You Need to Know
You have a great photo. Meanwhile, you need a 3D model. Suddenly, you feel stuck. But don’t worry. The solution is simpler than you think. Today, I will show you exactly how to turn an image into a 3D model. Furthermore, I will explain the tools, tricks, and traps to avoid. Consequently, you will finish this guide feeling confident. Let’s dive right in.
Why Would Anyone Do This?
First, ask yourself: why convert a flat image into a 3D object? Honestly, the reasons surprise most people. For instance, game developers use this trick to create characters. Similarly, architects turn photos of buildings into walkthrough models. Likewise, 3D printers rely on these models to print real-world objects. As a result, one simple image can become a tangible product.
Moreover, you don’t need a fancy studio. You need a photo and the right method. Therefore, let me break down the main approaches. After that, you can pick the one that fits your skill level.
Method One: Depth Mapping for Instant 3D Model
Depth mapping works like magic. Here’s why. Your image has colors and shapes. A depth map, however, adds grayscale information. White areas come forward. Black areas recede. Consequently, your software pushes and pulls the image into a 3D surface.
You can create a depth map manually. Alternatively, use an AI tool. For example, Depthify.ai does this instantly. You upload your image. Then the AI estimates the distance for every pixel. Finally, you export a displacement map. Afterward, plug this map into Blender or Photoshop’s 3D tools. In short, you get a 3D relief in minutes.
Nevertheless, depth mapping has limits. It works best for landscapes, logos, and bas-reliefs. But it struggles with complex objects like people or cars. So, keep that in mind.
Method Two: Photogrammetry – The Gold Standard
Now, let’s talk about photogrammetry. This method sounds fancy, but it’s actually straightforward. Instead of one image, you take many photos. You walk around your object. You snap pictures from every angle. Subsequently, software stitches these photos together. Then, it calculates depth from overlapping features. As a result, you get a full 360-degree 3D model.
I personally use Meshroom (free) or RealityCapture (paid). Both work beautifully. First, import 20 to 200 photos. Second, press “Compute.” Third, wait. Finally, export an OBJ or STL file. Consequently, you can 3D print a statue of your friend’s head or scan a historic artifact.
However, photogrammetry demands good photos. You need consistent lighting, no reflections, and lots of overlap. Otherwise, the software fails. Additionally, avoid moving objects. A wiggling leaf or a passing person ruins the scan. Therefore, take your time.
Method Three: AI-Powered Image to 3D
Artificial intelligence changes everything. Nowadays, you can feed a single image into a neural network. Then, the AI hallucinates the backside. Surprisingly, it often works. For example, tools like GET3D (NVIDIA) or Kaedim take one front-facing photo. Afterward, they generate a textured 3D model. You don’t need multiple angles. You don’t need depth maps. One clear image.
Thus, this method saves hours. Still, it has flaws. The AI might invent incorrect geometry. For instance, it might add a third arm or a bizarre tail. Consequently, you must clean up the mesh. Nevertheless, for concept art or quick prototypes, AI is unbeatable.
Pro tip: Use Leonardo.ai or Meshy. Both offer free tiers. Upload a character concept, and within 30 seconds, you have a rotating 3D model. Then, refine it in Blender. Honestly, I use this daily for game jams.
Method Four: Manual Modeling from Reference Images
Sometimes, you need total control. In that case, manual modeling wins. You open Blender or Maya. You place your image as a background reference. Then, you extrude, scale, and rotate vertices to match the picture. This approach takes patience. Nonetheless, you get perfect topology and exact proportions.
For example, imagine you have a blueprint of a car. You load the front, side, and top views. Next, you model a single polygon. After that, you extrude along the contours. Gradually, the car emerges. Finally, you add materials and lights. Consequently, you own a production-ready 3D asset.
You might ask, “Isn’t that hard?” Yes, it has a learning curve. But free tutorials on YouTube teach you everything. Also, start with simple shapes. A coffee mug becomes a fantasy helmet. A leaf becomes a spaceship wing. Above all, practice daily.
If you want to read about text converted to 3D videos, click here.
Essential Tools You Need Right Now for 3D Model
Let me list my favorite tools. Each serves a different purpose.
- Blender – Free, powerful, and endlessly capable. Use it for manual modeling and depth map editing.
- Meshroom – Free photogrammetry for Windows and Linux. Requires an NVIDIA GPU.
- RealityCapture – Paid but extremely fast. Best for professional scans.
- Meshy – Online AI tool. Turn one image into a 3D model in 30 seconds.
- Adobe Substance 3D Sampler – Great for turning photos into 3D materials and objects.
- TinkerCAD – Beginner-friendly. You can trace images to make 3D extrusions.
Therefore, you have options for every budget. Start with free tools. Upgrade only when you hit limits.
Step-by-Step Workflow for Beginners
Follow these steps. I guarantee success.
Step 1: Choose your image. Pick a well-lit, high-contrast photo. Avoid cluttered backgrounds. For photogrammetry, take 30+ photos.
Step 2: Pick your method. Use AI for speed. Use photogrammetry for accuracy. Then, use manual modeling for control.
Step 3: Process the image. For depth maps, convert to grayscale, AI, upload. For photogrammetry, then, check that all photos are sharp.
Step 4: Generate the 3D model. Run the software. Wait patiently. Then, inspect the result.
Step 5: Clean the mesh. Remove stray vertices. Fill holes. Simplify the geometry. Blender’s “Remesh” modifier helps.
Step 6: Export. Save as OBJ, STL, or FBX. Afterwards, import into your game engine, slicer, or renderer.
That’s it. You’ve turned an image into a 3D model.
3D Model Common Mistakes to Avoid
Everyone makes errors. Here are the biggest ones.
- Using low-resolution images. Blurry photos create blobby 3D models. Always start with high megapixels.
- Ignoring scale. Your model might be microscopically tiny or astronomically huge. Check your units.
- Forgetting to flip normals. Inside-out faces cause weird shadows. Blender’s “Show Face Orientation” reveals this.
- Over-relying on AI. AI models often have non-manifold geometry. That means your 3D printer will fail. So, always validate.
- Skipping the cleanup phase. Raw scans have noise. Spend ten minutes smoothing. The difference is night and day.
Consequently, your models will look professional if you avoid these pitfalls.
Real-World Examples to Inspire You
Let me share three stories.
Example 1: The Toy Restorer. A man found his childhood action figure broken. He took 40 photos with his phone. He ran them through Meshroom. Then, he 3D printed a replacement arm. Finally, he painted it to match. The toy lives again.
Example 2: The Indie Game Artist. She drew a monster on paper. She scanned the drawing. After that, she used Kaedim to generate a 3D model. Within one hour, the monster ran around in Unity. She saved two weeks of modeling.
Example 3: The Architecture Student. He photographed a ruined church. He used RealityCapture to create a 3D model. Subsequently, he imported it into Unreal Engine. Then, he added virtual flying buttresses. His professor gave him an A+.
Thus, you can apply these methods to art, engineering, or just for fun.
Advanced Tips for Better Results
You have mastered the basics. Now, level up.
Use cross-polarization. This kills shiny reflections. Put a polarizing filter on your lens. Also, polarize your lights. Then, photogrammetry works on glossy surfaces.
Add tracking dots. Place small stickers on featureless objects. For instance, a white cup needs black dots. The software locks onto those dots. As a result, you get perfect alignment.
Combine methods. First, use AI to generate a base mesh. Second, manually sculpt details in Blender. Third, bake textures from your original image. Consequently, you get speed and quality.
Optimize for 3D printing. Use the “Decimate” modifier in Blender. Reduce polygons to under 100k. Then, run a “Make Manifold” check. Finally, export as STL. Your printer will thank you.
Frequently Asked Questions (FAQ)
1. Can I turn any image into a 3D model?
Yes, but results vary. Simple images with clear edges work best. Complex photos with occlusions (like a person with crossed arms) confuse software. Therefore, start with a single object on a plain background.
2. Do I need a powerful computer?
Not necessarily. AI tools run in your browser. Photogrammetry, however, needs a decent GPU (at least 4 GB of VRAM). Manual modeling works on any laptop from the last five years.
3. How long does the process take?
AI: 30 seconds to 2 minutes. Photogrammetry: 10 minutes to an hour, depending on photo count. Manual modeling: 2 hours to several days. So, choose based on your deadline.
4. What file formats should I export?
For 3D printing: STL or 3MF. For games: FBX or glTF. Then, rendering: OBJ with MTL textures. For web: GLB.
5. Is it legal to turn any image into a 3D model?
Copyright applies. You cannot scan a copyrighted statue or a branded toy without permission. However, your own photos or public domain images are fine. When in doubt, ask a lawyer.
6. Which free tool is best for beginners?
Blender, hands down. It also has a built-in “Import Images as Planes” add-on. That lets you trace directly. Additionally, Meshy offers free AI conversions. Try both.
7. How do I fix a hole in my 3D model?
In Blender, select the hole’s edge loop. Press “F” to fill. Or use the “Mesh > Clean Up > Fill Holes” tool. Afterwards, smooth the new faces.
8. Can I use a screenshot from a movie?
Technically, yes. Legally, no. Movie screenshots are copyrighted. Furthermore, the resulting model will lack depth information because movies use lighting tricks. So, avoid this.
9. What’s the single most important tip?
Lighting. Good lighting makes good scans. Bad lighting ruins everything. Always use soft, diffused light from multiple directions. Never use direct flash.
10. Will 3D modeling replace traditional sculpting?
No, but it complements it. Many artists scan clay sculptures into digital models. Then, they refine them on a computer. Subsequently, they 3D print the final version. It’s the best of both worlds.
Final Thoughts
You now know how to turn an image into a 3D model. Start small. Take a photo of your coffee mug. Run it through Meshy. Marvel at the result. Then, try photogrammetry with 30 photos of a shoe. Finally, build a complete scene.
Remember, you don’t need expensive gear. Your phone’s camera works. Free software works. Your determination works. Therefore, go create something amazing. Then, share it with the world.
Still have questions? Leave a comment below. I reply to every single one.
Happy modeling.