How to Make Great Videos Using Claude
Video creation used to cost a lot of money. For instance, you needed a professional crew and weeks of work. However, those days are over. In fact, artificial intelligence has changed everything, and Claude sits right at the center of this creative revolution. As a result, you no longer need to learn complex software. Likewise, you do not have to hire expensive studios.
Instead, you describe your vision, and then Claude handles the heavy lifting. Moreover, this guide walks you through every step along the way. Specifically, we will start with setup, and eventually, we will finish with your final video. Therefore, let us dive right in.
Why Claude Excels at Video Production
To begin with, Claude understands natural language well. As a result, it turns your words into technical actions with ease. Furthermore, it connects with many platforms seamlessly. For example, through a single interface, you get access to over thirty leading video and image models. Consequently, you can generate 4K video clips up to fifteen seconds long. Best of all, you never need to touch an API key or a separate editor.
Now, think of Claude as your personal production assistant. First, it interprets what you mean. Next, it selects the right model, and then it configures all the settings. After that, it brings the finished clip back to your chat. In this way, your conversation becomes the production environment. Ultimately, the whole workflow feels smooth and natural.
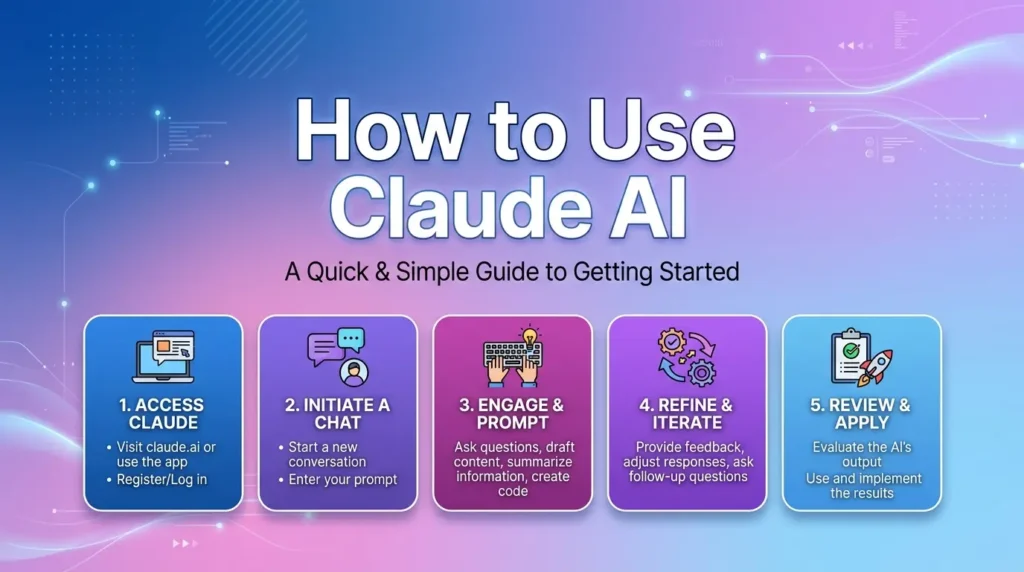
Getting Started Claude: Choosing Your Toolkit
Before you create your first video, you need to connect Claude to video tools. Several good options exist. Your choice depends on what you need.
Higgsfield MCP: The All-in-One Connector
First of all, this tool turns Claude into a professional video studio. Remarkably, setup takes about one minute. To get started, you use the Claude desktop app or web interface. Next, you add Higgsfield as a custom connector. After that, you sign in to your account, and then you start prompting right away.
Moreover, the connector exposes over thirty powerful models. For instance, these include Veo 3.1, Sora 2, Kling 3.0, and Wan 2.6. By default, Claude picks the best model for your needs. However, you can also pick one yourself if you prefer. Alternatively, you can send the same brief to several models at once. As a result, this lets you compare results side by side effortlessly.
Remotion Agent Skills: For Programmers
If you like coding, Remotion offers a great option. One command gives Claude expert knowledge of Remotion’s React-based framework. This works well for people who know programming concepts.
The setup is simple:
npx create-video@latest my-video && cd my-video
npx skills add remotion-dev/skills
claude
After these steps, you describe your video in plain language. Claude generates production-quality React components on the first try. It handles all the technical details for you.
Claude Code Video Toolkit: The Open-Source Option
To start, this toolkit gives you an AI-native video workspace. First, Claude writes the script for you. Next, it generates voiceover and visuals seamlessly. After that, it renders the final MP4 file. Best of all, the open-source models cost just cents per video. As a result, this makes it incredibly budget-friendly for creators of all levels.
Furthermore, the /setup command walks you through everything step by step. For example, it sets up cloud GPU providers, file transfer, and voice settings without any hassle. Once done, type /video, and then you can start creating right away.
Crafting a High-Quality Video: Step-by-Step
Now let us walk through the actual process. Follow these steps to turn your idea into a polished video.
1. Generate Consistent Characters
To begin with, character consistency makes or breaks AI videos. Without proper planning, for instance, characters change appearance between shots. As a result, this ruins the viewing experience entirely. Fortunately, the solution is quite simple. First, generate a base image. Then, use it as a reference for all later shots.
For example, generate a character using Nano Banana. Next, save the output as your reference image. Later, when you need the same character in different poses, use the –reference parameter. In doing so, this keeps the identity consistent across every scene. Consequently, your cast stays recognizable throughout the whole video from start to finish.
2. Write Scripts with Natural Pacing
Pacing keeps viewers engaged. Studies show that about fifteen words per five seconds works well. That is natural pacing. Thirty words per ten seconds follows the same ratio. Too many words make speech feel rushed. Viewers get overwhelmed. Too few words create awkward pauses. They lose attention.
Claude can help you write scripts that fit these guidelines. You can even specify a target duration. Claude adjusts the word count for you. For educational content, a 2-minute structure works well: Hook, Phenomenon, Mechanism, and Synthesis. This flow keeps viewers interested from start to finish.
If you want to read about how to create Inshot videos, click here.
3. Design Your Visual Aesthetic
The visual style matters as much as the content. Through Higgsfield MCP, you can direct cinematographic settings in plain language. You control camera moves, lens choice, depth of field, and aspect ratio. Simple prompts handle all of these.
For brand videos, you can define brand profiles. These contain colors, fonts, and typography rules. When you create a new project, the brand’s visual identity applies automatically. This system ensures every video matches your brand guidelines perfectly.
4. Add Voiceover and Audio
Audio quality affects how viewers perceive your video. Several options exist for generating voiceovers. The Claude Code Video Toolkit supports both ElevenLabs and self-hosted Qwen3-TTS. You get nine distinct voices plus voice cloning capabilities.
For voice cloning, record a reference sample. Save it to a brand profile. The same approach works for multilingual lip sync. This enables you to create localized versions of your content. Music generation tools like ACE-Step integrate seamlessly. You control mood, instruments, and style with simple prompts.
5. Enhance with Transitions
Professional videos use transitions to connect scenes smoothly. The transition library includes many options. You can use glitch effects with RGB shift, cinematic lens flares, zoom blurs, and checkerboard reveals. These transitions add polish. They prevent jarring cuts between scenes.
You can preview all available transitions before applying them. This visual reference helps you choose the right effect for each scene.
6. Generate Subtitles
First of all, accessibility matters for every creator. Subtitles extend your reach to viewers who watch without sound. To begin, the process involves extracting audio from your video. Next, you run speech-to-text transcription. Finally, you burn the captions into the video file itself.
For platforms like TikTok and YouTube Shorts, use Hormozi-style subtitles. These appear one word at a time. This style keeps viewers engaged. As a result, it improves retention rates on short-form content. Moreover, the Claude Code Video Toolkit includes helpful commands like /redub. Consequently, this lets you modify existing videos easily. You can change voices or adjust subtitle styles whenever you need.
Advanced Techniques for Better Results
Once you have mastered the basics, try these advanced strategies. They will elevate your videos even further.
Run Multi-Model Comparisons
To start, different AI models excel at different styles. For example, Veo 3.1 handles realistic scenes best. Meanwhile, Kling 3.0 produces vibrant animations. Instead of guessing, you can ask Claude to run the same scene on several models. After that, it shows you the best result. As a result, this helps you find the perfect model for each shot. In turn, you save credits by avoiding wasted experiments.
Use Image-to-Video References
For ecommerce and product videos, image-to-video works wonderfully. To begin, you upload a single product image. Next, Claude generates video clips showing the product in action. As a result, this technique creates lifestyle shots and variant reels from just one SKU. Consequently, your product videos look professional and engaging every time.
Build a Content System
To begin with, the most efficient creators treat video production as a system. In other words, they avoid a series of one-off projects. Instead, you train a character just once. Then, you generate scenes across different locations. After that, you reuse the same cast weeks later. Fortunately, Claude holds the full project state across sessions. As a result, you can pick up exactly where you left off.
Moreover, this approach benefits marketing teams greatly. For example, a single conversation can produce hundreds of campaign-ready videos. Best of all, these work for every platform. Additionally, the output runs through batch generation and parallel processing. Consequently, you get studio-quality content at unprecedented speed.
FAQ
Do I need programming skills?
Not necessarily. Platforms like Higgsfield MCP need no coding. Just describe your video in plain language. Claude handles everything else. But programming skills help with advanced workflows like Remotion.
What kinds of videos can I make?
The possibilities are huge. You can make AI video ads, product videos, social media content, educational videos, and cinematic work. Many creators run entire YouTube channels from a single brief.
How much does it cost?
Costs vary. Open-source models cost about $0.01 for voiceover and $0.23 for AI video clips. Higgsfield offers free credits at signup. Paid plans unlock higher volume and longer durations. This is far cheaper than traditional video production.
Can I keep characters consistent?
Yes. Generate a base image first. Use it as a reference for all later generations. Platforms like Higgsfield let you train a character from a handful of photos. You reuse it across every scene. Character identity stays stable every time.
How long does generation take?
It depends on the model and duration. Simple clips render in seconds. Longer or complex videos take several minutes. Running multiple models in parallel increases speed but uses more credits.
What formats and resolutions work?
Most platforms support MP4 with resolutions up to 4K. You can also specify aspect ratios like 16:9 for YouTube, 9:16 for TikTok, and 1:1 for Instagram.
Final Thoughts
Creating great videos with Claude is now easy. The technology keeps getting better. The tools available today seemed impossible just a few years ago. Whether you are a solo creator, a marketer, or part of an agency, you can produce professional videos. The power is at your fingertips.
Start with one project. Try different models. Refine your approach based on what works. Soon you will ship videos that rival traditional productions in quality. All at a fraction of the cost and time. The future of video creation is here. And it starts with a simple prompt.
Now go make something amazing.