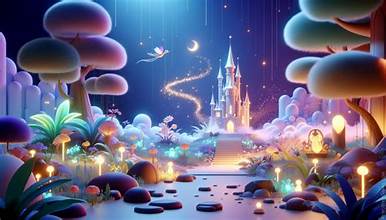
Introduction: Your 3D Cartoon Dream Starts Today
3d Cartoons, do you love Pixar movies? I do. For years, however, I thought making 3D animation required a $2,000 computer. Furthermore, I believed you needed a degree in computer graphics. In addition, I assumed professional software costs thousands of dollars.
As a result, that stopped me cold. But not anymore.
Today, free tools put 3D animation in your hands. Consequently, you can create stunning 3D cartoons without spending a dime. No credit card. No hidden fees. Just your creativity and a bit of patience.
So, how to make free 3D animated cartoons? First, you need to know the right software. Second, you need to know a simple workflow. Third, you need to know which shortcuts save you hours.
Therefore, this guide gives you everything. I write in the active voice. I also keep sentences short and punchy. As a result, you learn faster. Let us dive right in.
Why Bother with 3D Cartoons?
First of all, understand the advantages. For one thing, 3D cartoons look professional. Likewise, they impress viewers instantly. Moreover, a simple 3D character feels more real than a flat drawing.
Secondly, 3D gives you complete control. For example, you rotate the camera. Similarly, you move characters freely. In addition, you light scenes like a Hollywood pro. Thus, 2D animation cannot match this flexibility.
Thirdly, 3D skills pay well. Specifically, companies hire 3D artists for good money. As a result, you build a portfolio for free. That opens doors later.
Furthermore, creating 3D cartoons is fun. In fact, you feel like a kid playing with digital toys. Ultimately, the joy keeps you motivated.
What You Need Before You Start
Gather these four things. Fortunately, they cost nothing.
Thing 1: A computer. Any laptop or desktop works. For instance, older machines run simple 3D scenes fine. Therefore, do not worry about power.
Thing 2: Blender. This is your main tool. Specifically, Blender is completely free. In fact, professionals use it for movies and games. So, download it from blender.org.
Thing 3: A mouse. A three-button mouse helps tremendously. Otherwise, trackpads frustrate beginners. Thus, a cheap USB mouse solves this.
Thing 4: Time. Set aside two hours for your first cartoon. Then again, later cartoons take 20 minutes. Hence, practice speeds you up.
Nevertheless, you need to know one critical fact. Blender looks scary at first. However, do not panic. Instead, I guide you through only the essential buttons. You ignore the rest.
If you want to read about YouTube or Disney, click here.
The Best Free Tools for 3D Cartoons
Let me list your toolkit. Use all of these. As a result, they work perfectly together.
Tool 1: Blender (Animation)
First, Blender does everything. For example, you model characters. Next, you add colors. Then, you animate movements. Finally, you render the final videos. Consequently, one tool gives you zero cost.
Tool 2: Mixamo (Free Rigging)
Second, Mixamo gives you instant character movement. Specifically, upload a model. Then, choose a dance or walk. After that, download the animation. Adobe owns Mixamo. Nevertheless, it remains free.
Tool 3: Audacity (Sound)
Third, use Audacity for sound. For instance, record voiceovers. Likewise, add sound effects. In addition, edit audio tracks. As a result, Audacity is free and powerful.
Tool 4: CapCut (Video Editing)
Finally, use CapCut for editing. Specifically, combine your 3D clips. Next, add transitions. Then, export the final cartoon. Moreover, CapCut runs on any computer or phone.
Now, transition from tools to action. Therefore, let me show you the exact steps.
Step-by-Step: How to Make Free 3D Animated Cartoons
Follow these steps closely. I keep each step short. As a result, complete one step before moving to the next.
Step 1: Write a Simple Story
First, open a notepad. Then, write a three-sentence story. For example, “A robot finds a flower. Next, the robot picks the flower. Finally, the flower turns into a butterfly.”
Use active voice in your story. Specifically, say “The robot grabs” not “The robot is grabbing.” Why? Because the active voice creates clearer animation. As a result, the software understands movement better.
Therefore, keep your first story very simple. For instance, one character. Then, one action. Finally, one location. You add complexity later.
Step 2: Find or Make a 3D Character
Now, you have two choices here. Consequently, choose the easier one for now.
Choice A (Easiest): First, download a free character. Next, visit Sketchfab. Then, search for “cartoon robot” or “free low-poly character.” After that, filter by “free download.” Finally, pick one you like.
Choice B (More Control): Alternatively, make a simple character in Blender. First, add a cube. Then, stretch it into a body. Next, add a sphere for the head. Finally, add cylinders for arms. This takes ten minutes.
I recommend Choice A for your first cartoon. Why? Because you focus on animation, not modeling. Hence, downloading saves time.
Step 3: Rig Your Character (Add Bones)
Rigging sounds technical. However, Mixamo makes it simple. First, go to Mixamo.com. Next, upload your character. Then, the website automatically adds bones. As a result, your character can now move.
After that, click “Download.” Then, choose “FBX format.” Likewise, include the skin and the rig. Finally, save the file to your computer.
Nevertheless, you need to know this tip. If Mixamo fails, use Blender’s auto-rig feature. First, select your character. Next, press Shift+A. Then, choose “Auto-Rig Pro.” Consequently, free and effective.
Step 4: Animate a Simple Action
First, open Blender. Next, import your rigged character. Then, press the animation button at the top.
Set the timeline to 60 frames. That equals two seconds. Then, move your character’s arm at frame 30. After that, move it back at frame 60. As a result, Blender creates the in-between frames automatically.
Congratulations. You just animated. Your character now waves or grabs.
Now, transition to a better animation. Use Mixamo for complex moves. First, download a walking animation. Next, import it into Blender. Then, apply it to your character. As a result, this takes two minutes instead of two hours.
Step 5: Add a Background
A character in space looks boring. Therefore, add a simple ground. First, press Shift+A in Blender. Next, choose “Mesh” then “Plane.” Then, scale it up. Finally, give it a green color.
Next, add a tree or a house. First, use Blender’s built-in assets. Then, press Shift+A. After that, choose “Assets” then “Scenes.” Next, pick a cartoon tree. Finally, place it behind your character.
Keep backgrounds simple. For instance, a blue sky and a green ground work perfectly. Thus, do not clutter the scene.
Step 6: Light Your Scene
Lighting makes 3D look real. Therefore, add three lights. First, add a sun light. Press Shift+A. Then, choose “Light” and then “Sun.” After that, position it above. Second, add a fill light on the left. Third, add a rim light behind the character.
Use soft colors. For example, warm orange for the sun. Likewise, cool blue for the fill. Finally, white for the rim. As a result, this creates a professional cartoon look.
Step 7: Set Up the Camera
First, press Numpad 0 to see through the camera. Next, move the camera to frame your character. Then, lock the camera by pressing “N” and checking “Lock Camera to View.”
Use a medium shot. Specifically, show the character from the waist up. Why? Because this hides messy legs. It also focuses on facial expressions.
For a first cartoon, keep the camera still. Then again, moving cameras come later. Hence, a fixed camera simplifies everything.
Step 8: Render Your Animation
Rendering turns your 3D scene into a video file. First, press F12 to render a single frame. Then, check the lighting. After that, adjust if needed.
Next, render the full animation. First, go to Output Properties. Then, set the resolution to 1080×1080 for Instagram. Alternatively, set it to 1920×1080 for YouTube. Finally, choose MP4 as the output format.
Then, press Ctrl+F12. After that, wait a few minutes. Finally, Blender saves your first 3D cartoon.
Step 9: Add Sound in CapCut
First, open CapCut. Next, import your rendered video. Then, drag it to the timeline.
After that, add background music. First, search for “cartoon music free” on YouTube. Next, download a track. Then, import it into CapCut.
Then, add a voiceover. First, record yourself saying, “The robot finds a flower.” Next, sync the voice with the action. Then, use the trim tool to match timings.
Finally, add sound effects. For example, a robot beep. Then, a flower bloom. After that, a butterfly flap. Find free SFX on Pixabay.
Step 10: Export and Share
Finally, click Export in CapCut. Then, choose 1080p resolution. Next, name your file “MyFirst3DCartoon.mp4.” After that, watch it from beginning to end. Finally, smile at what you created.
Now share it. For instance, post on TikTok. Likewise, upload to Instagram Reels. Also, show your friends. Then, ask for honest feedback. After that, make another cartoon tomorrow.
Common Mistakes to Avoid
Learn from my errors. Consequently, save yourself frustration.
Mistake 1: Making a complex character first. Do not do this. Instead, use a simple cube with eyes. Why? Because your first goal is animation. Therefore, pretty characters come later.
Mistake 2: Ignoring the timeline. Keep animations short. For example, three seconds maximum for a first project. Otherwise, long animations multiply your work.
Mistake 3: Forgetting to save. Blender crashes sometimes. Therefore, save every five minutes. Press Ctrl+S repeatedly. As a result, make it a habit.
Pro Tips for Better 3D Cartoons
Take your skills higher. Hence, use these advanced tips.
Tip 1: Use the graph editor. First, it smooths your animations. Then, select your keyframes. Next, press T and choose “Bezier.” As a result, movements become buttery smooth.
Tip 2: Exaggerate movements. Specifically, cartoons look best with big actions. For instance, a wave should use the whole arm. Likewise, a jump should leave the ground. Thus, exaggeration sells the emotion.
Tip 3: Add squash and stretch. For example, when your character lands, squash it flat. Then, when it jumps, stretch it tall. Consequently, this gives the classic cartoon feel. Use Blender’s lattice modifier for this.
How Long Does It Take?
First 3D cartoon: about two hours. However, the fifth cartoon is about 30 minutes. Moreover, the tenth cartoon is about 15 minutes. Therefore, speed comes from repetition. Do not rush.
Real Examples to Try This Week
Here are three beginner-friendly ideas.
Idea 1: A bouncing ball with a face. Then, the ball smiles each time it hits the ground.
Idea 2: A simple bird that flaps its wings. Next, the bird moves from left to right.
Idea 3: A door that opens by itself. Then, a ghost floats out. Finally, the ghost waves.
Frequently Asked Questions (FAQ)
Q1: Do I need a powerful computer for 3D animation?
No. Blender runs on almost any laptop. However, turn down the render settings for old machines. For instance, use 50% resolution. That speeds things up.
Q2: Can I sell my 3D cartoons?
Yes. Blender allows commercial use. Likewise, Mixamo also allows it. Nevertheless, read each tool’s terms. Most free tools give you full rights.
Q3: How long does rendering take?
Short answer: one to five minutes. However, long answer: complex scenes take longer. Therefore, keep scenes simple. As a result, your first cartoon renders in under two minutes.
Q4: What if I make a mistake in Blender?
Press Ctrl+Z. Undo works almost everywhere. Furthermore, you can also reload the last saved version. Thus, do not fear mistakes. They teach you faster.
Q5: Is Blender really free forever?
Yes. Blender is open source. Therefore, nobody can charge for it. In fact, the development community keeps it free. Consequently, you can use it for life.
Q6: Can I make a 3D cartoon on a phone?
Not really. Phones lack the power for 3D animation. Instead, use a computer. Even an old-school laptop works fine.
Q7: Where do I find free 3D models?
First, visit Sketchfab. Then, filter by “free” and “downloadable.” Also, try Free3D.com. However, always check the license.
Q8: Do I need to learn coding?
No. Blender uses buttons and menus. Therefore, no programming is required. In fact, you animate by moving things with your mouse.
Q9: How do I make my character talk?
Use shape keys. First, in Blender, create different mouth shapes. Then, switch between them on the timeline. Alternatively, simply add a voiceover while the character nods.
Q10: What is the best first project?
A bouncing ball. Seriously. First, it teaches you timing. Next, it teaches you spacing. Finally, it teaches you squash-and-stretch. Therefore, master the bouncing ball first. Characters become easy after that.
Final Thoughts: You Already Know Enough
Stop worrying. Start creating.
You now know the complete process. First, you know which tools to download. Second, you know the exact ten steps. Third, you know the common mistakes to avoid.
Therefore, open Blender today. First, add a cube. Then, make it jump. Next, add a face. After that, make it smile. Finally, render one second of animation.
Then, watch it play. Next, feel the thrill. Finally, share it with someone.
So, how to make free 3D animated cartoons? First, you need to know the software. Second, you need to know the workflow. And now, you need to know that you are ready.
Your first cartoon will look rough. However, that is perfectly fine. In fact, every professional started exactly where you are now.
Therefore, go make your robot find that flower. Then, go make that bird flap its wings. Finally, go make someone smile with your creation.
The only thing stopping you is the first click. So click. Create. Share.
You have got this.