How to Use Veo 3.1: A Complete Guide to Google’s Next-Gen AI Video Model
Google made Veo 3.1. It is an AI video tool. It changes how we make videos. You can turn ideas into videos. These videos look cinematic. The tool adds audio too. The audio matches the video. But you must learn its features. You also need good prompts. This guide will help you. We cover the main features. We share key techniques. Then, we also give tips. Let’s dive in.
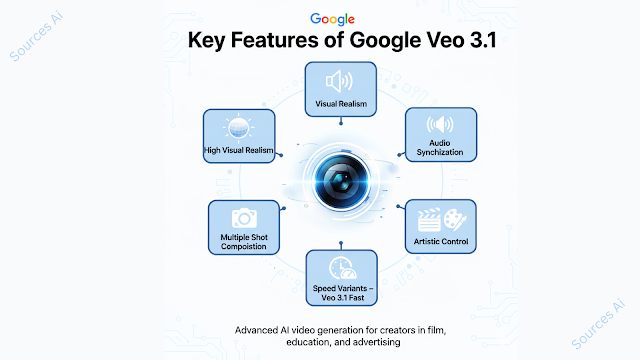
What Makes Veo 3.1 Different?
Veo 3.1 beats the older model. It looks more real. It listens to your prompts better. You have more control, too. The audio is much richer. You hear natural speech. You also hear matching sound effects. The tool keeps characters consistent. This works in every scene. So, it helps you tell better stories.
If you want to read about Google Lumiere, click here.
Getting Started with Veo 3.1
You can get Veo 3.1 in many places. Try the Gemini API. It is in Google AI Studio. You can also use Vertex AI. That is for developers. Creators can pick Flow. Flow is Google’s filmmaking tool. It has made 275 million videos. The Gemini app has it too. This makes it easy for anyone. Flow is the simplest choice. Start there
The Core Features
Native Audio Generation
Veo 3.1 adds audio to every video. The audio fits the action. You hear speech and sound effects. You also hear background noise. Then, you do not need extra tools. This speeds up your work. The sound matches the scene. It saves time. It saves work. Your videos get more interesting.
Ingredients to Video
The “Ingredients to Video” feature is a significant advancement. Specifically, you can provide up to three reference images. These images can be of a character, object, or scene. They guide the generation process. For instance, you can upload a picture of a specific actor. Then, you can upload a picture of a product. After that, you prompt Veo 3.1 to create a review video. This video will feature both elements seamlessly. This capability maintains character consistency across multiple shots. This is crucial for storytelling. It keeps your characters looking the same.
First and Last Frame
This innovative feature provides exceptional narrative control. First, you supply a starting image. Then, you supply an ending image. Next, you direct Veo 3.1 to generate the transition between them. It also includes accompanying audio. For example, you could provide a photo of a room in the morning. You could also provide another photo of the same room at night. The model will create a smooth time-lapse transformation. This is perfect for creating artful scene transitions. It is also great for epic changes.
Scene Extension
Your story no longer ends with the original generation. Scene extension allows you to create longer videos. In fact, you can even make videos lasting a minute or more. You do this by generating new clips. These clips connect to your previous video. The model bases each new clip on the final second of the previous one. Consequently, this maintains visual and audio continuity. As a result, you can build extended establishing shots. You can also create long narratives seamlessly. The story flows naturally.
Reference Image Support
Reference images help you control your video. You upload pictures. They guide the look. They guide the style too. Your characters stay the same. Your mascots keep their look. Then, your main characters keep their look. They move to new scenes. Then they do not change. This keeps your work polished.
Mastering Prompts for Veo 3.1
Effective prompting unlocks Veo 3.1’s full potential. The model understands professional cinematography language. It understands this better than casual descriptions. Consequently, using structured prompts yields dramatically better results. Here is how to do it. Follow these steps carefully.
The Five-Part Prompt Structure
A recommended format includes five parts. First, describe the shot composition. Specify the framing. For example, say “wide establishing shot.” You could also say “medium shot.” Second, describe the subject and action. Be very detailed here. Third, define the environment. Include background details. Fourth, specify the camera movement. For example, “slow push-in.” You could also say “static.” Fifth, describe the style and mood. Use terms like “golden hour lighting.” You can also say “cinematic.” This structure gives the model clear guidance. It improves your results significantly.
Cinematography Terminology
Veo 3.1 responds exceptionally well to professional film vocabulary. For instance, you can use terms like “Dutch angle at 15 degrees.” You can also say “rack focus from foreground to background.” Or, you can specify “three-point lighting setup.” This precision allows you to achieve specific visual effects. Such effects would be difficult to describe in plain language. Furthermore, specifying lens types provides additional control. You can say “wide-angle.” You can also say “macro lens.” The model knows these terms. Therefore, use them often.
Negative Prompts
To eliminate common artifacts, use negative prompts. Artifacts are unwanted elements in the video. For instance, you can include instructions like this. “Negative: no motion blur.” Also, “no face distortion.” Additionally, “no warping.” And “no morphing.” Finally, “no duplicate limbs.” This strategy significantly reduces generation errors. It also improves the overall quality of your output. Your videos will look cleaner.
Hand-Over-Hand Prompting
Hand-over-hand prompting links your clips. It makes smooth transitions. End one clip with an action. Start the next with the same action. The video flows well. For example, try this for Clip 1. “The person reaches for the door.” Also, “hand moves toward it.” For Clip 2, write this. “The hand grabs the handle.” Also, “the hand pulls it open.” This works for longer videos. It keeps things moving.
Technical Specifications
Veo 3.1 offers multiple output formats. For example, you can choose 720p resolution. You can also choose 1080p resolution. The frame rate is 24 FPS. It also supports landscape aspect ratio. This is 16:9. It also supports portrait aspect ratio. This is 9:16. You can select from 4-second durations. You can also select 6-second durations. Finally, you can select 8-second durations. These are for standard generation. For those needing high-quality, professional-grade options, exist. You can get up to 4K resolution. This is for professional productions. These options give you flexibility.
Fast Mode and Iteration
Veo 3.1 Fast is quick. It makes videos in under 60 seconds. The normal mode takes 90 seconds. Fast Mode saves time. It also costs less. It is about half the price. The quality is not as high. But it is good for testing. You can try your ideas fast. Then, you can pay for better quality. You can upgrade later. You keep the same prompts. This is very handy.
Practical Tips for Better Results
Here are some practical tips to improve your results. Firstly, start with simple prompts. Gradually add complexity as you learn. Secondly, experiment with different styles. Try different moods too. Thirdly, pay attention to the lighting. Also, pay attention to the composition. Fourth, use reference images to maintain consistency. Fifth, always review your outputs critically. Learn from each generation. These practices will improve your skills. They will also improve your videos.
FAQ
What platforms offer Veo 3.1 access?
Veo 3.1 is accessible through several platforms. For instance, you can find it in the Gemini API. This is via Google AI Studio. It is also in Vertex AI. Additionally, you can use it through Flow. Flow is Google’s AI filmmaking tool. Finally, the Gemini app offers access too. Developers can integrate it into their applications. Creators can use Flow for direct video creation. There are many options.
Can I use reference images to maintain character consistency?
Absolutely. Veo 3.1 allows you to upload reference images. You can upload up to three. These images guide the generation process. This is particularly useful for maintaining character consistency. Then, it works well across multiple scenes. You can also apply a specific style. This method is very effective.
What are the key prompting techniques for better results?
Structure your prompts using a five-part format. Include shot composition. Also include the subject and the action. Include the environment too. Don’t forget camera movement. Finally, include style. Also, incorporate professional cinematography terminology. Then, use negative prompts to avoid artifacts. Employ hand-over-hand prompting for extended sequences. These techniques work well together. They will improve your results.
What output formats and durations are supported?
Veo 3.1 supports 720p resolution. It also supports 1080p resolution. The frame rate is 24 FPS. 4K is available for professional use. It generates 4-second clips. It also generates 6-second clips. Finally, it generates 8-second clips. You can choose a landscape aspect ratio. This is 16:9. You can also choose portrait. This is 9:16. These options cover most use cases.
What is the Veo 3.1 Fast option?
Veo 3.1 Fast offers faster generation times. It takes under 60 seconds. It costs approximately half the price. However, quality is slightly reduced. Nevertheless, this mode is excellent for rapid iteration. It is also great for storyboarding. It helps you test ideas quickly.
How does Veo 3.1 handle audio?
Veo 3.1 generates rich native audio automatically. This includes natural conversations. It also includes synchronized sound effects. Moreover, it includes ambient soundscapes. This eliminates the need for external audio mixing. It ensures perfect synchronization with visuals. The audio fits perfectly.
Is Veo 3.1 production-ready?
Yes, outputs download as MP4 files. They also download as MOV files. They include native audio. Presets flow directly into editing suites. They also flow into DAMs. Finally, they flow into CMS tools. Additionally, all videos include SynthID watermarking. This identifies AI-generated content. It is ready for professional use. You can use it right away.
Final Thoughts
Veo 3.1 represents a transformative step in AI video generation. It combines native audio with enhanced creative controls. It also offers superior prompt understanding. This empowers creators to produce professional-quality videos faster. Start with the five-part prompt structure. Experiment with reference images. Use Fast Mode for iteration. Gradually, you will discover the full potential. The journey is rewarding. The results speak for themselves. Happy creating.