How to Use Adobe Podcast: What You Need to Know
Have you ever heard a podcast with clear speech and wondered how they achieved that sound? The answer, surprisingly, is not always expensive gear. Instead, the secret often lies in advanced, yet accessible, software. Therefore, if you are ready to turn rough recordings into polished, professional episodes, you must understand Adobe Podcast. This guide, consequently, will provide you with that essential knowledge.
First, we will explore what this platform truly is. Then, we will walk through your first steps to access it. After that, we will break down its core tools with clear, actionable steps. Finally, we will answer your most pressing questions. Ultimately, our goal is to equip you with the confidence to produce outstanding audio.
Understanding the Adobe Podcast Platform
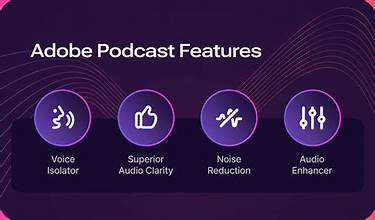
Primarily, Adobe Podcast is a web-based, AI-powered audio studio designed for creators. Importantly, it is part of the Adobe Creative Cloud ecosystem. As a result, it promises seamless future connections with tools like Premiere Pro. However, its core strength lies in two revolutionary AI features: Enhance Speech and Mic Check.
The Enhance Speech tool is a groundbreaking technology. Specifically, it uses artificial intelligence to digitally remove background noise, echo, and reverb. Imagine recording in a slightly noisy room. Traditionally, that audio might be unusable. With Enhance Speech, however, you can often salvage it, achieving a clear, studio, like sound with a single click.
Similarly, the Mic Check feature is a proactive solution. Before you even record your main session, this tool analyzes your microphone and environment. It listens for common issues like background hum or excessive plosives. Then, it provides you with immediate, visual feedback and simple instructions to fix the problems. Consequently, you can ensure perfect audio quality from the very start of your recording.
Your First Steps: Setting Up and Starting a Project
Now, let’s move into the practical application. To begin, you need to access the platform.
Access the Platform:
First, navigate to podcast.adobe.com. Next, sign in with your Adobe ID. If you do not have one, you must create a free account. Importantly, a free account gives you generous access to test the core features.
Initiate a Project:
Once logged in, you will see a dashboard. Here, you click the “Create a new project” button. Immediately, you will be prompted to name your project. For instance, use a clear name like “Interview_JohnDoe_Episode5”.
The Workspace Overview:
After creating a project, you will enter the main workspace. This interface is refreshingly clean. On the left, you see your project files and recordings. In the center, you see the waveform timeline for editing. On the right, you find the crucial tool panels for Enhanced Speech and other adjustments.
The Core Workflow: Recording, Enhancing, and Editing
With your project open, you are ready for the core process. This workflow follows a logical sequence: check, record, enhance, and edit.
Phase 1: The Essential Mic Check
Before recording, always use Mic Check. Click the “Mic Check” button on the right panel. Then, follow the on-screen prompts to read a short sentence. The AI will analyze your audio. Subsequently, a meter will show you if your levels are “Too low,” “Good,” or “Too high.” It will also detect background noise. If issues appear, the tool will guide you to adjust your microphone position, change your environment, or modify your input settings. Finally, once you get a “Good” rating, you are ready for pristine recording.
Phase 2: Recording Your Audio
Now, click the prominent “Record” button. You will get a three-second countdown. Then, start speaking. You can record multiple separate tracks, which is ideal for hosting with a guest. During recording, you see a real-time waveform. If you make a mistake, do not stop. Instead, pause, and then repeat the sentence. You can easily edit the error out later. When finished, click stop. Your audio file will automatically appear in your project library and on the timeline.
Phase 3: Applying Enhanced Speech
This is where the magic happens. In your timeline, select the clip you wish to improve. Then, on the right panel, locate the “Enhance Speech” toggle. Turn it on. The AI will then process the audio. Processing time depends on the file length. Once finished, you must listen to the result. A/B compare the original and enhanced versions by toggling the button. Often, the difference is staggering, room tone vanishes, and voice clarity pops. However, use your ears. On some already-clean audio, it might add an overly processed texture. Therefore, always review.
Phase 4: Basic Editing and Publishing
Adobe Podcast offers essential editing tools. To remove mistakes or silences, first, zoom into the timeline. Then, click and drag to select the unwanted portion. Finally, press the delete key. You can also split clips. For this, place the playhead where you want the cut and press ‘S’ or use the split tool. To fade clips in or out, simply drag the small circles at the clip edges. When your episode is polished, you export it. Click “Export” in the top right. Choose your format (MP3 is standard for podcasts). Then, after processing, download your file. You are now ready to upload it to any podcast host like Spotify or Apple Podcasts.
Maximizing Your Results: Pro Tips and Best Practices
To truly master the tool, follow these strategic tips.
Start with the Best Source Audio Possible:
- Remember, AI enhancement is powerful, but it is not a miracle worker. Always strive for a quiet, soft-furnished room. Speak clearly and consistently. Essentially, give the AI high-quality material to refine.
Use Mic Check Every Time:
- Your recording environment can change. Turning on the air conditioner or outside traffic can ruin a take. Therefore, make Mic Check a non-negotiable first step for every recording session.
Edit First, Enhance Later:
- Perform your core editing, cutting mistakes, and arranging segments on the original audio first. Then, apply Enhance Speech to the final arranged version. This workflow saves processing time and ensures a consistent sound across all clips.
Beware of the “Over-Enhanced” Sound:
- Sometimes, on very clean recordings, Enhance Speech can make voices sound slightly synthetic or tinny. Always A/B compare. If the original sounds more natural, do not use the enhancement. Your ear is the final judge.
Integrate with Your Full Workflow:
- Record and enhance in Adobe Podcast. Then, for multi-track podcasts, you might import the cleaned, edited audio into a video editor like Premiere Pro for final mixing with music and sound effects.
Frequently Asked Questions (FAQ)
Q: Is Adobe Podcast really free?
A: Yes, but with a crucial detail. Adobe Podcast operates on a “free tier” model. This means you can sign up and use core features like Enhance Speech (for up to 3 hours of lifetime usage) and Mic Check for free. However, for ongoing, unlimited access, you will need a paid Creative Cloud subscription.
Q: What are the system requirements?
A: Since it is a web app, the main requirement is a modern web browser (Chrome, Edge, or Safari are best). You also need a stable internet connection for processing and a decent microphone. Notably, you do not need a powerful computer, as the processing happens on Adobe’s servers.
Q: Can I use it for things other than podcasts?
A: Absolutely. While designed for podcasting, creators use it for cleaning up audio for YouTube videos, online course lectures, voice-over demos, interview transcripts, and any recording where clear voice audio is critical.
Q: How does it compare to traditional editing software like Audacity or Adobe Audition?
A: This is a key distinction. Adobe Podcast is not a full Digital Audio Workstation (DAW). It is a streamlined, AI-focused tool. For instance, it lacks multi-band compression, detailed equalization, or extensive plugin support. Its strength is speed and simplicity for achieving a clean voice track. For advanced audio engineering, you would still use Audition or similar software.
Q: Is my audio data safe with Adobe Podcast?
A: According to Adobe’s privacy policy, your audio files are used to process your requests and improve their services. They state they do not manually review your content. For full details, you should always review the official Adobe Privacy Policy.
Conclusion: Should You Use Adobe Podcast?
In summary, Adobe Podcast is a transformative tool for audio creators. It democratizes high-quality sound by removing technical barriers. The Mic Check feature empowers you to record correctly from the start. Meanwhile, the Enhance Speech tool acts as a powerful safety net and polish for your recordings.
Therefore, if your primary need is to record, clean up, and quickly edit spoken-word audio, this platform is an exceptional choice. It is intuitive, fast, and built on stunning AI technology. However, if you require deep, surgical audio editing or music production, you will eventually need a more advanced DAW.
Ultimately, the best way to know is to try it. Start with the free tier. Run a test recording through Mic Check. Process a clip with Enhance Speech. Listen to the dramatic results. From that moment, you will understand exactly how this tool can elevate your podcast from amateur to professional, letting your voice be heard exactly as you intended.